hello friends! new(ish)!
Build a PC: Difference between revisions
Jump to navigation
Jump to search
>85x No edit summary |
>85x No edit summary |
||
| Line 15: | Line 15: | ||
* Install the CPU heatsink before putting the motherboard into the case, unless it's a water cooling setup. | * Install the CPU heatsink before putting the motherboard into the case, unless it's a water cooling setup. | ||
* The CPU socket lever on Intel motherboards will be hard to push down and feel like it's taking too much force. That's normal. | * The CPU socket lever on Intel motherboards will be hard to push down and feel like it's taking too much force. That's normal. | ||
=== Common power connectors and their usage === | |||
{| cellpadding="2" style="border: 1px solid darkgray;" | |||
! width="160" | 4-pin molex | |||
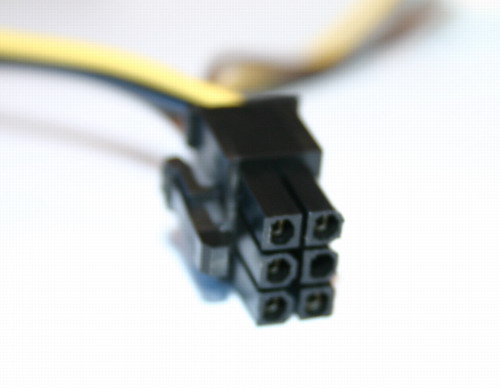
! width="160" | 6-pin PCI-E | |||
! width="160" | 6+2-pin PCI-E | |||
! width="160" | 20+4-pin ATX | |||
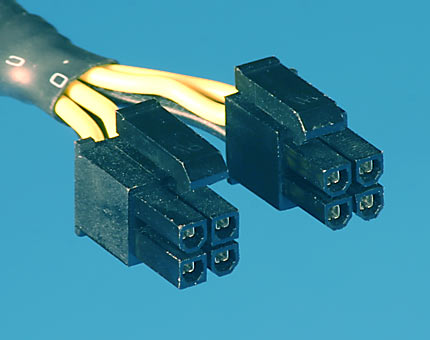
! width="160" | 4+4-pin ATX12V/EPS | |||
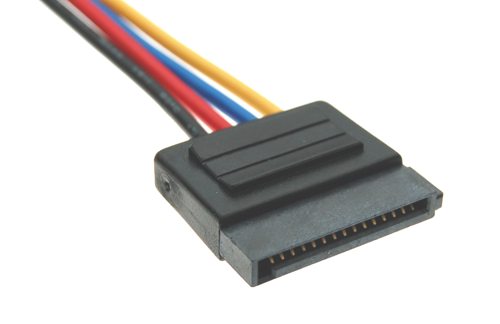
! width="160" | 15-pin SATA | |||
! width="160" | 4-pin floppy | |||
|- align="center" | |||
| style="border: 1px solid blue;"| | |||
[[File:4pin_molex.jpg|150px]] | |||
| style="border: 1px solid blue;"| | |||
[[File:6pin_pcie.jpg|150px]] | |||
| style="border: 1px solid blue;"| | |||
[[File:6plus2pin_pcie.jpg|150px]] | |||
| style="border: 1px solid blue;"| | |||
[[File:20plus4pin_atx.jpg|150px]] | |||
| style="border: 1px solid blue;"| | |||
[[File:4plus4pin_eps.jpg|150px]] | |||
| style="border: 1px solid blue;"| | |||
[[File:15pin_sata.jpg|150px]] | |||
| style="border: 1px solid blue;"| | |||
[[File:4pin_floppy.jpg|150px]] | |||
|- align="center" | |||
|Commonly used for fans and older drives. || Used for graphics cards.<br />According to the ATX specification, it should not transmit more than 75W. || Also used for graphics cards, but can (should) output up to 150W. || Used as the motherboard's main power source.<br />Always plug in both parts. || Used as the motherboard's secondary power source, but still required for the motherboard to work.<br />When using 8 pins, it's called the EPS connector, but if only using 4 pins, it's ATX12V. || The Serial ATA power connector is used for hard drives, SSDs and optical drives. || An obsolete connector, used for powering floppy drives. | |||
|} | |||
== External Links == | == External Links == | ||
Revision as of 13:23, 29 January 2014
Building a desktop
Building your own desktop allows for greater customisation and control. It's worth it even though it's harder.
Some common issues when building your PC
- Use standoffs under the motherboard mounting holes!
- Read the manual that came with your motherboard.
- Plug in all the power connectors.
- If you have a graphics card, connect your monitor to your graphics card and NOT to the motherboard
- Spread thermal paste however you feel like, use about half a pea size amount, if using the stock heatsink don't touch the preapplied stuff
- Install the CPU heatsink before putting the motherboard into the case, unless it's a water cooling setup.
- The CPU socket lever on Intel motherboards will be hard to push down and feel like it's taking too much force. That's normal.
Common power connectors and their usage
| 4-pin molex | 6-pin PCI-E | 6+2-pin PCI-E | 20+4-pin ATX | 4+4-pin ATX12V/EPS | 15-pin SATA | 4-pin floppy |
|---|---|---|---|---|---|---|
| Commonly used for fans and older drives. | Used for graphics cards. According to the ATX specification, it should not transmit more than 75W. |
Also used for graphics cards, but can (should) output up to 150W. | Used as the motherboard's main power source. Always plug in both parts. |
Used as the motherboard's secondary power source, but still required for the motherboard to work. When using 8 pins, it's called the EPS connector, but if only using 4 pins, it's ATX12V. |
The Serial ATA power connector is used for hard drives, SSDs and optical drives. | An obsolete connector, used for powering floppy drives. |
External Links
- PCPartPicker - Computer component aggregator and comparison tool dedicated to picking out compatible computer components, allowing one to seamlessly create a desktop.
- Logical Increments - Formerly known as the "Falcon Guide", a good starting point to building a computer on a budget, components are grouped by price point.
- ChooseMyPC.net - Cookie cutter PC build generator, also hosts several guides and resources related to builds.


